
Sourdough is the way leavened bread was made for thousands of years, prior to the 1950s when commercial yeast became the defacto way to rise a dough and make bread. Sourdough is not your parent's bread, it is not even your grandparent's bread, but it is the bread of your ancestors. Just like everything else in our 5 min. culture, older, and sometimes better ways of doing things, especially with food, has given way to faster and more convenient. For people with the attention span of gnats, this might be considered a good thing, but when one can think beyond the next five minutes, good nutrition and taste should be more important - when you have the time and planning to do so.
In that respect, sourdough bread does not take 5 minutes, or 14 as with commercial yeast, it can take days to get a good vigorous starter going, and a day or so to make a decent loaf of sourdough bread, but the rewards can be worth it with a bit of forethought and preparation time. I would argue that it takes about as much work, but the time is spread out. If you have patience, sourdough rocks and it should be the only bread you eat. Okay, that is a bit of an exaggeration, but seriously it kicks other bread's asses.
You cannot have proper sourdough bread without the use of a starter. If you know someone that has a bit of starter on the go, you can obtain it pretty quickly, but if you are like me and you want to make your own starter, the steps are fairly simple, it only takes a bit of patience beyond some basic ingredients.
How to create a Sourdough Starter
Ingredients:
- Flour - preferably unbleached, can be rye, wheat, or whole wheat. I used white, general purpose
- Non-chlorinated, or filtered water - if you do not have a source of additive-free water, I recommend filtered water that has been left to stand for 24 hours. I simply filled a wine glass with Britta water and let it stand for a day prior to use.
- A glass container with a lid, or a mason jar - I have heard that metal is not ideal for this, and I avoid as much plastic when it comes to food so I recommend glass
- (Optional) Grapes, apple skins, or potato - I used grapes
Process:
When using grapes, make sure that they are organic and they should have a bit of white on their skins, which indicate that natural yeasts are present.
Cut up or mash several grapes, I used about 15 or so into the clean glass container, cover the container, but do not fasten it tight, just leave the top on loosely. Place the container in the cupboard (room temperature) and wait for 3 or 4 days.
After 3 or 4 days, add water and flour and mix thoroughly and cover loosely - C02 is released so you do not want an accident with an exploding jar.
 Wait a few days - this depends - check it every day. When you see some bubbling, you will know that the process is underway. Patience is key here, mine took over a week before it seemed to be working.
Once the bubbling is underway, you can remove whatever grape material (it can disintegrate) you can find.
A note about mold - you can throw out the whole thing, or do what I did and just remove whatever looks moldy.
After a day or two, I have read that you dump half of the mixture and then add more flour and water, I just skipped that and started using my starter because I do not believe in wasting unnecessarily.
Now, you should have some sourdough starter, the rest is just feeding - Write about care of sourdough starter

After two weeks, my starter looked like this, a bit messy and you can definitely smell it (sour/sweet), but it is active and it is alive.
When I started mine, it was in late autumn, last week of October, so I left mine in the cupboard, but I think after a couple of days, you can put it in the fridge.
At this point, you can refrigerate it and feed it once a week, except when using it. The rule I follow is whatever I take out of it, I put back into it. If I take half out to make a loaf of bread, I will put in enough water and flour to top it up to where it was before. I do not put sugar inside this starter, but occasionally I will put potato water (cooled water that potatoes were boiled in). At this point, I do not think killing the starter is an easy thing to do. Neglected, yeast will go into hibernation, but heat will kill it, and impurities can hurt the colony, so be careful what goes into it, and I'm fairly sure that chlorinated water is not a good idea.
How to make a Sourdough Boule and how I learned
When I started on the crazy idea of growing bacteria and fungi in my cupboard, I accepted the idea that it might turn into an ugly pile of smelly mold and got on with it, but I also had a divergent vision of a crusty, mulch-textured and richly hued loaf as crafted by professional bakers in upscale bakeries. The vision does not come with a minimal effort and it takes time and the willingness to let go of perfection.
 My first effort consisted of a couple of dinner rolls that I baked impatiently after eyeballing the proportion of ingredients, only about eight minutes of kneading, a hour of rise (called proofing), and then tossing into the oven. I was in a hurry to get the thing done and see how the process works rather than achieve something I would serve to friends and family.
The results left much to be desired but I was prepared for that and despite my missteps, the damn things rose (albeit not by much) and I had two delicious bricks of sourdough bread. They did not last 24 hours as I ate one that night, and then the other in the morning with soup.
After a bit of reading and watching some YouTube videos, I looked at what I was doing was to figure out not what when wrong, but rather, how to improve my technique.
 My next effort was a boule of sorts, which is a french loanword for rounded loaf, which was a bit more in line with what I wanted to be able to achieve. While it was still a bit dense, the use of moisture in the oven gave the bread a slightly more brownish colouring in areas. I even added caraway seeds and a bit of rosemary for flavour.


 next I wanted to have make myself a cheeseburger with fries, so instead of going to the grocery store and purchasing some kaiser buns, I figured, what the hell, why not make some sourdough buns. The process worked as before with the result being two very dense but otherwise edible and tasty sourdough buns. The problem of course was the burger being squished during consumption. I was in a hurry and did not allow sufficient time for a proper rise - lesson learned again. I also tried a rough baguette which had a nice texture and had a better colour because I remembered to add moisture to the oven during the intial stages of baking.
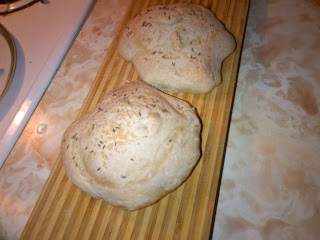


Things came together a few days later when I decided that an overnight "proofing" was required so I gathered my patience and prior to making dinner I decided to create a dough.
Sourdough Boule:
Ingredients:
2-3 cups of Flour - I used white, unbleached all purpose - use what you want, but it is best that you use the same type as that of your starter. I have heard and read, you can convert a starter, by slowly introducing it to different types of flour.
1 cup of water (probably best if it is filtered and left to stand for a day, or if you have spring water)
1/3 to 1/2 a cup of starter
a half teaspoon of sea salt - kosher salt works as well. I have read that iodized salt is a not recommended
a teaspoon to a tablespoon of oil, lard, or melted butter - I used canola oil because I find it convenient, but I intend to switch to lard with a bit more experience.
You can add sugar - I prefer to use honey - a note here, I have read that pasteurized honey works best as it is less likely to contain organisms that might compete with your sourdough starter, but I will probably experiment with unpasteurized honey at one point. I literally use about a half-tablespoon to a full tablespoon.
Optional Spices and/or Herbs - I typically use a bit of rosemary or oregano with caraway seeds as my go-to herbs. About a half teaspoon of each or less, depending on your tastes.
An Oven - Something that goes to at least 450 Fahrenheit or 220 Celsius
Some people use a baking stone, but I don't have one, so I bake my bread in a ceramic casserole dish
I have heard that a great way to do it is in a dutch oven
A bit of water for while it is baking
The Process:
Combine all the dry ingredients, stirring
Then add the oil, lard, or butter
Combine the ingredients in a mixing bowl, and stir into a unified batter.
Add the sourdough starter and stir into a unified mix
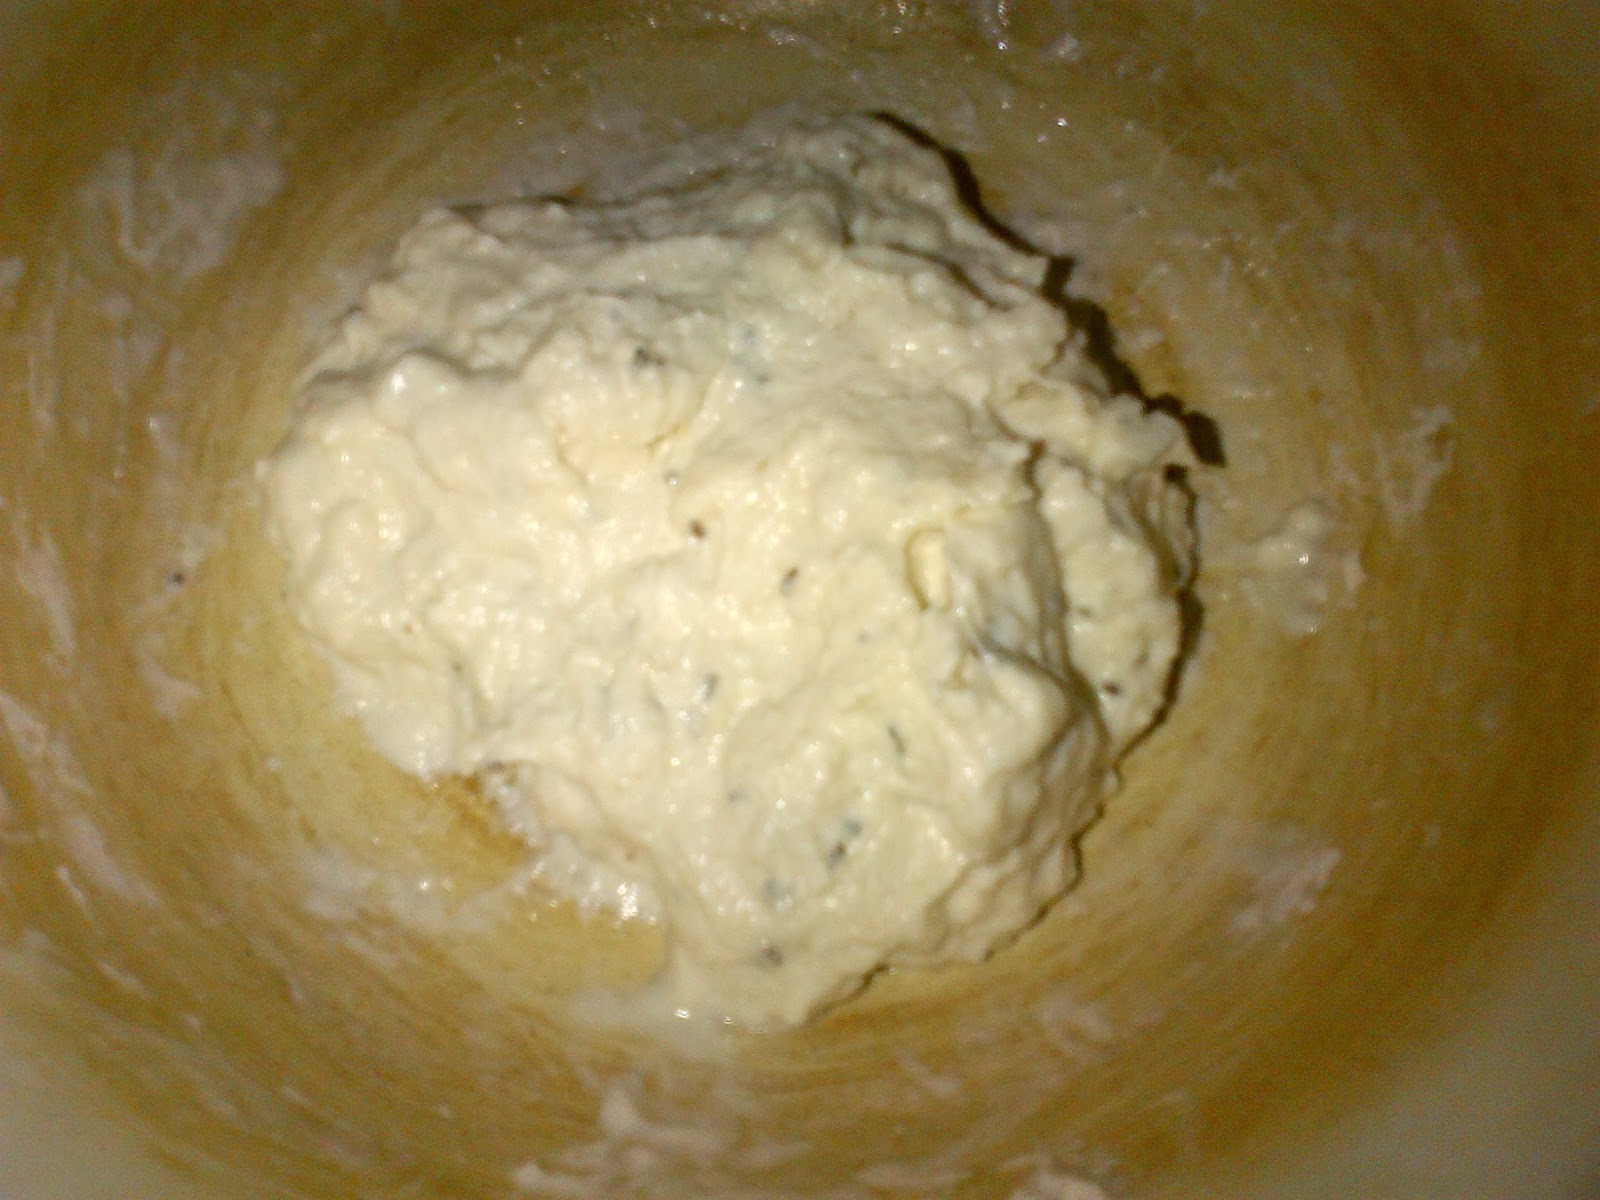
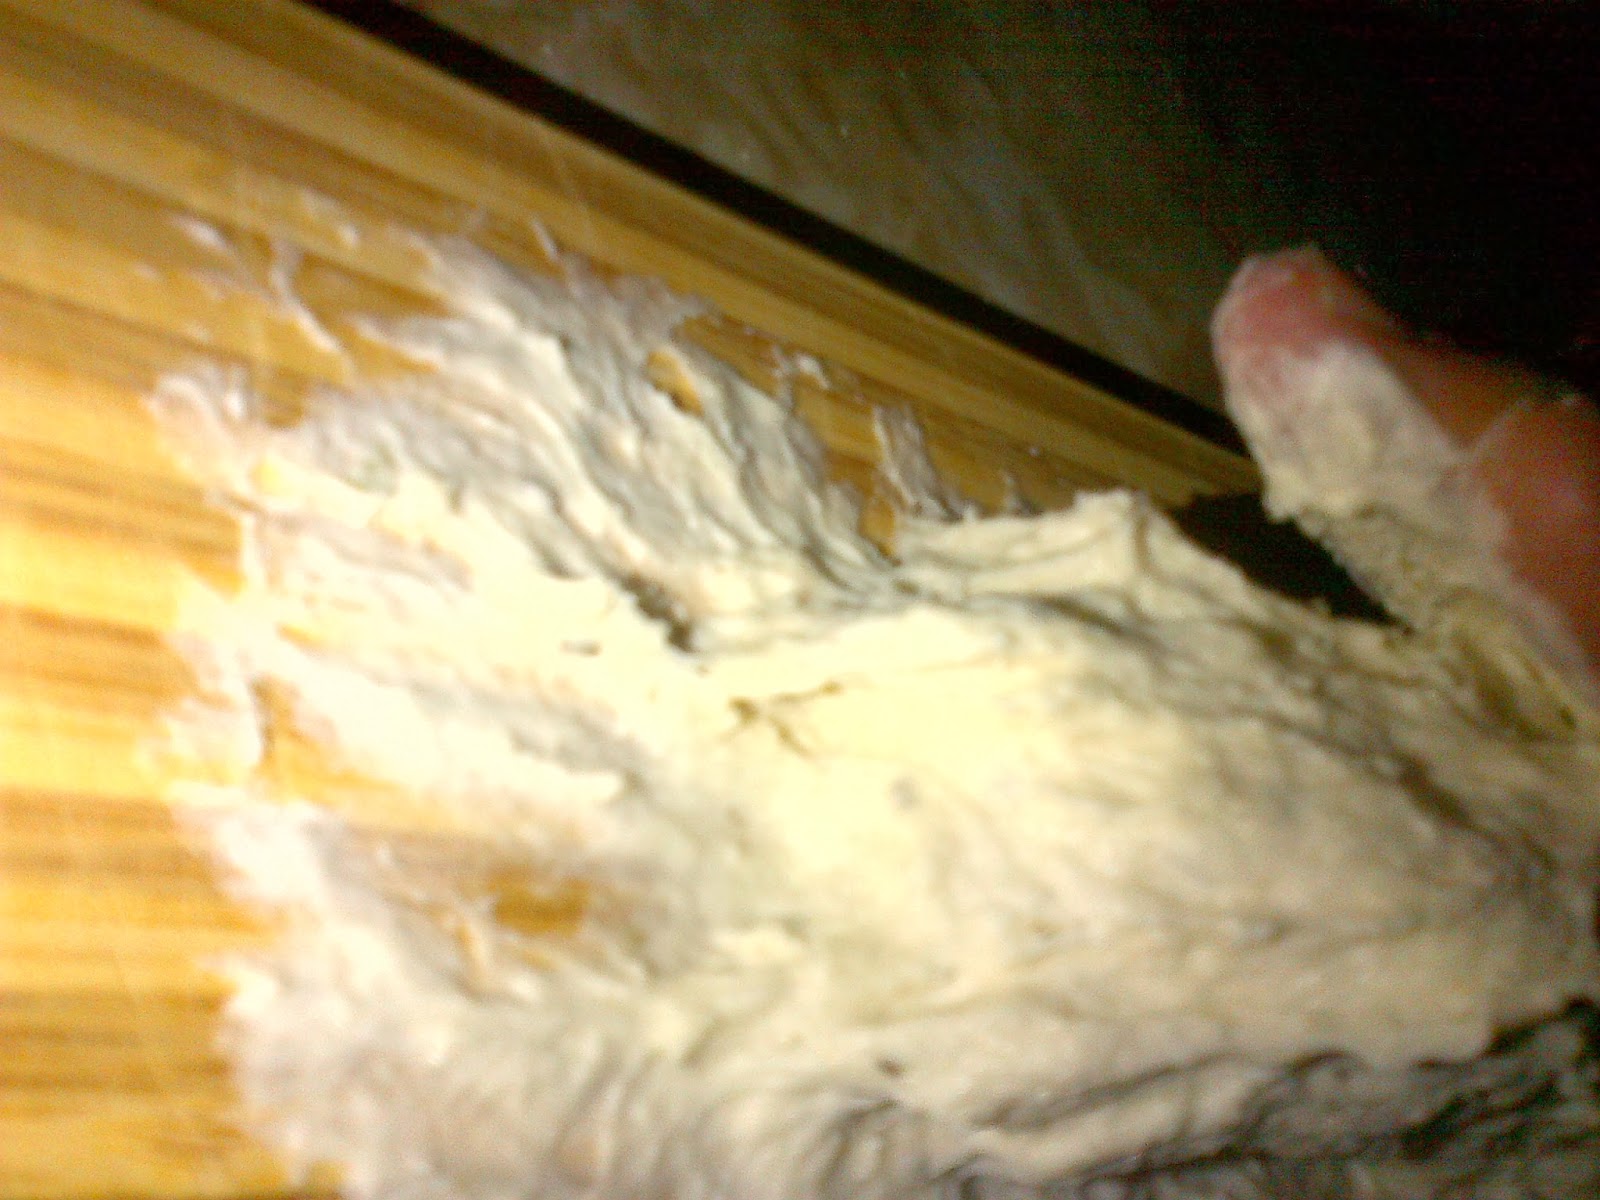
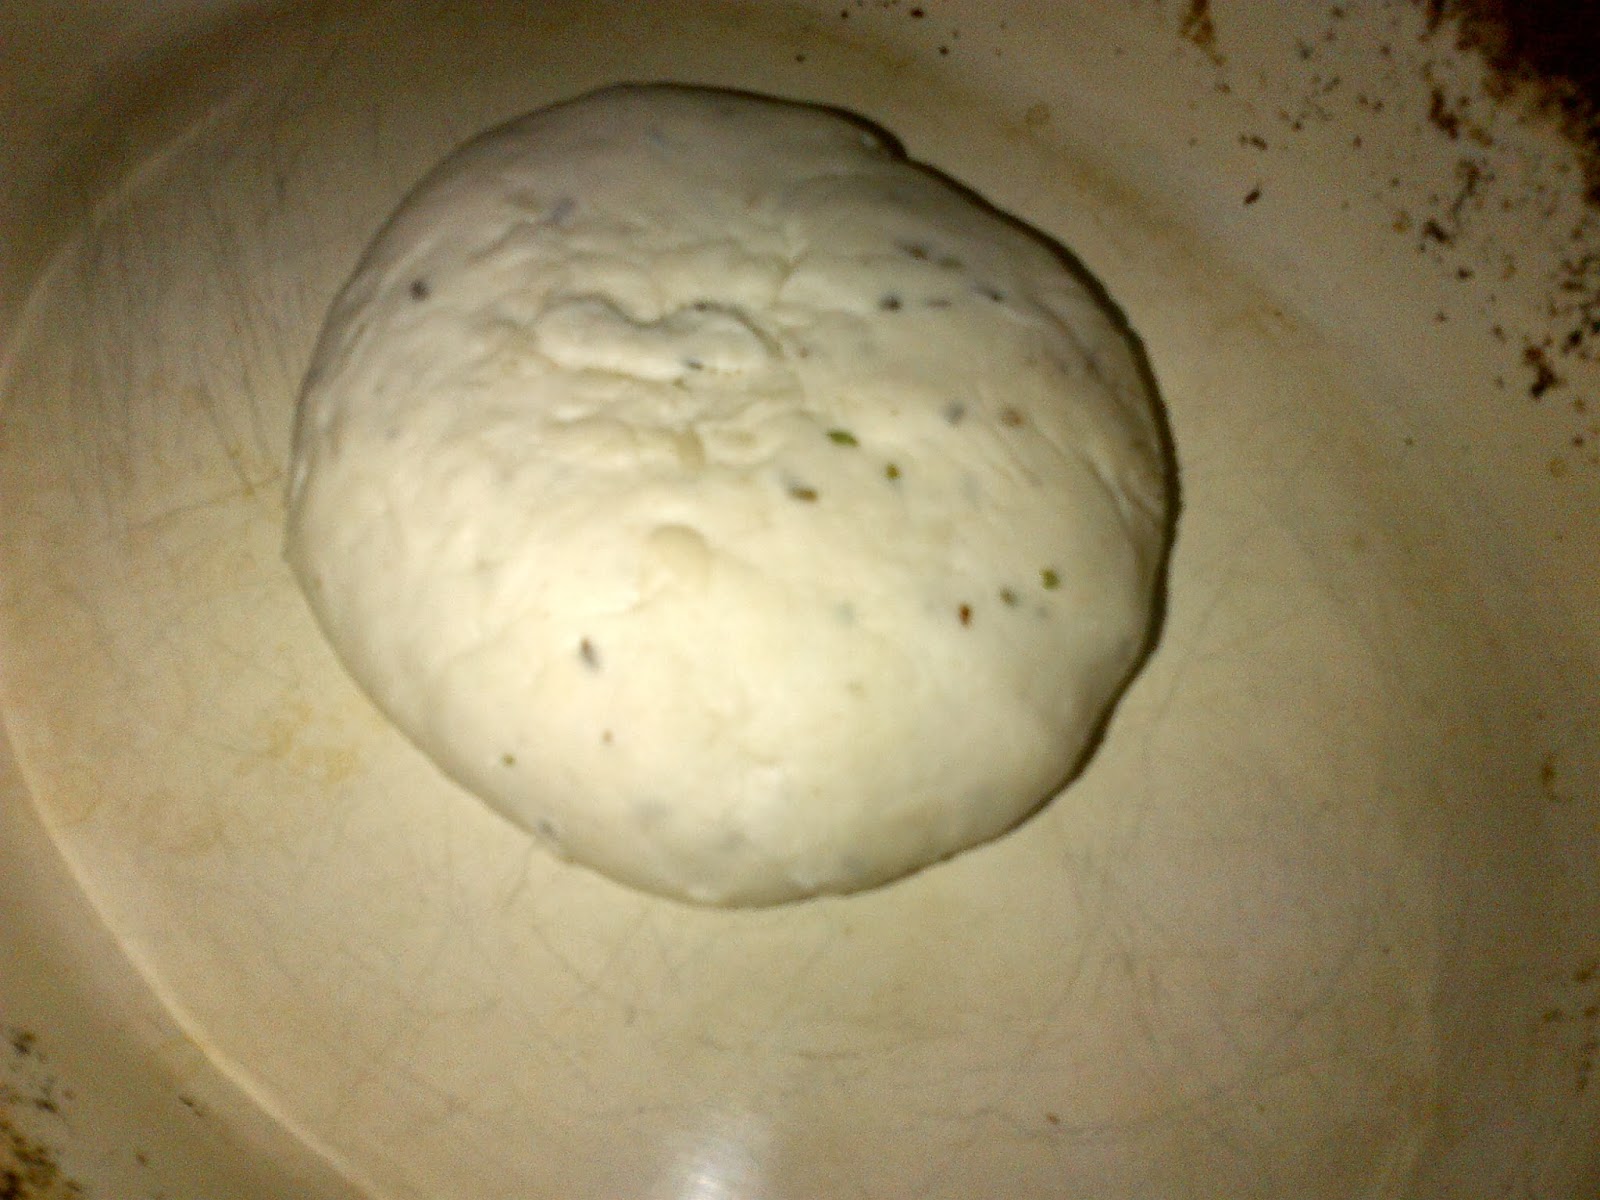
The dough should resemble a shaggy mass that is not quite solid, but something you should be able to handle on a cutting board without the mixture spilling onto the counter.
I typically allow my mixture to sit in the bowl after the initial mixing, covered with a tea towel for about 20-30 minutes.
After the initial mixing, you can remove the mass from the bowl and put the entire thing on a cutting board - with your bare hands (hopefully you have washed them, but that is up to you)

Knead the dough, in this case I recommend that you use the palm of your hand to stretch the dough and pull it back into it's mass repeatedly, folding it into itself, over and over again. I typically knead my dough for approximately 10 minutes until the dough starts to be more manageable.
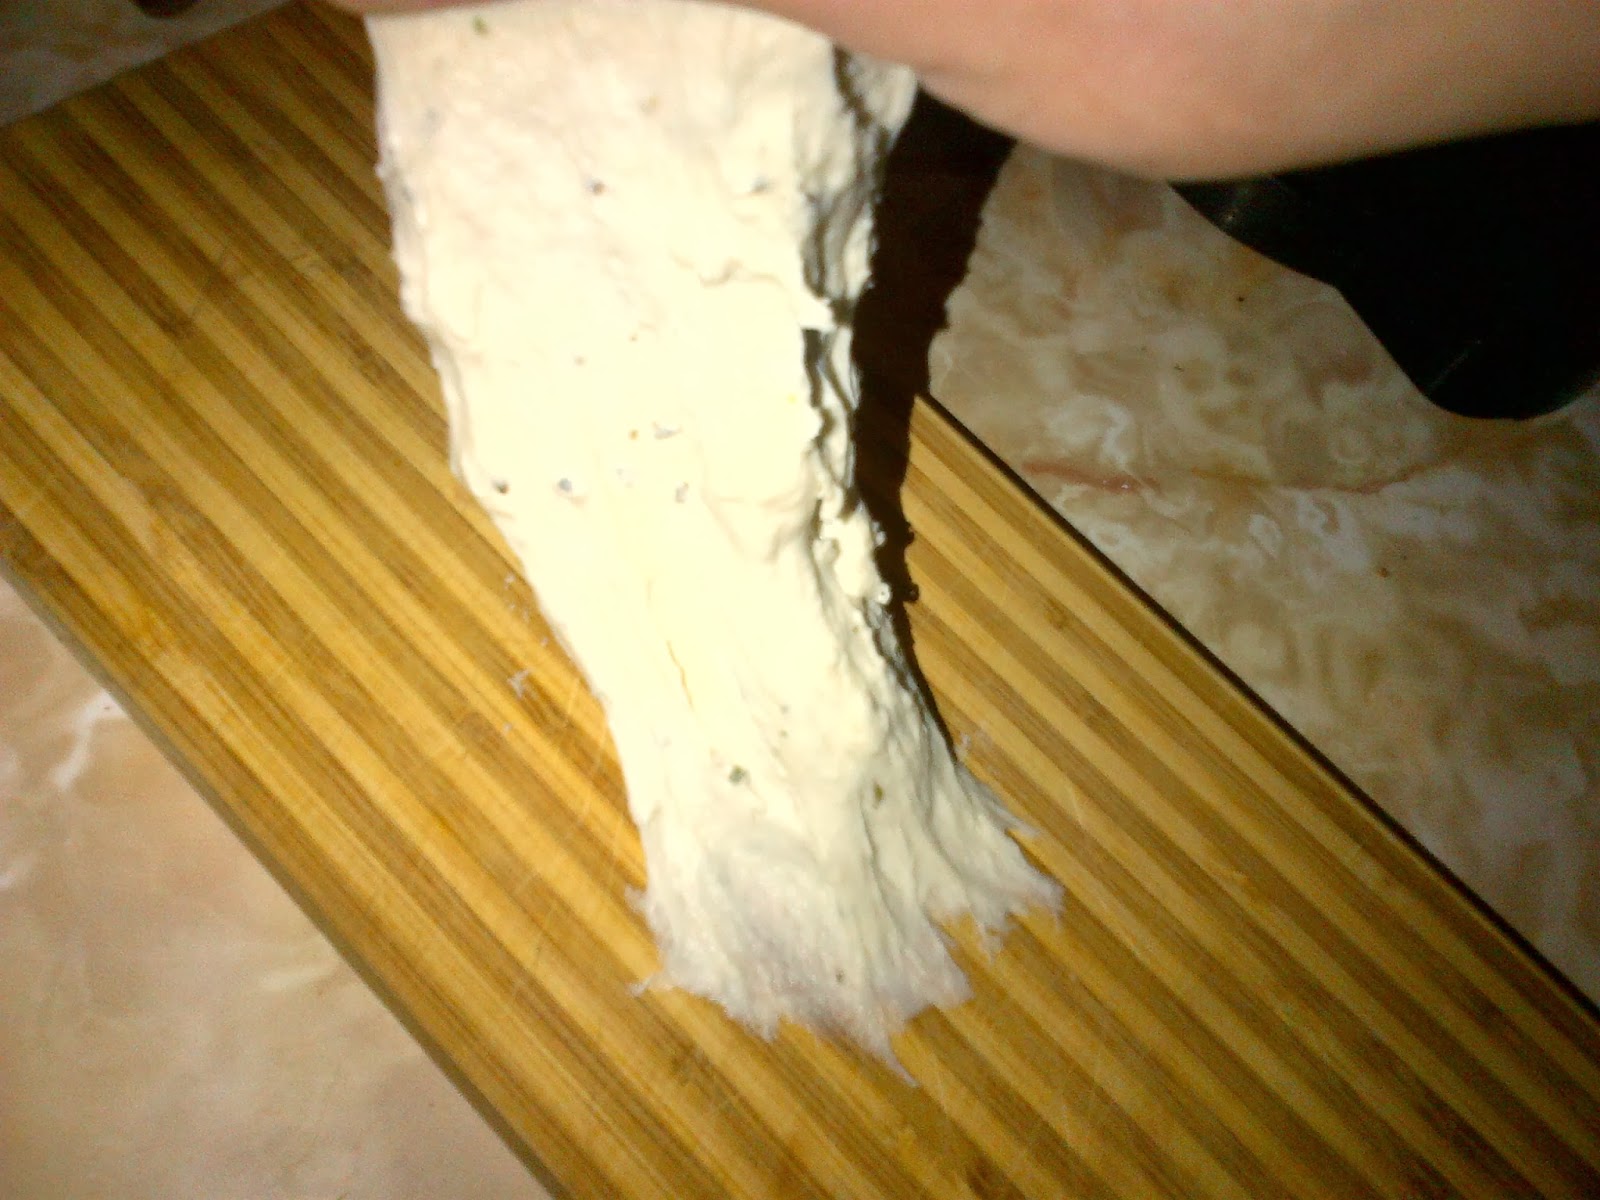
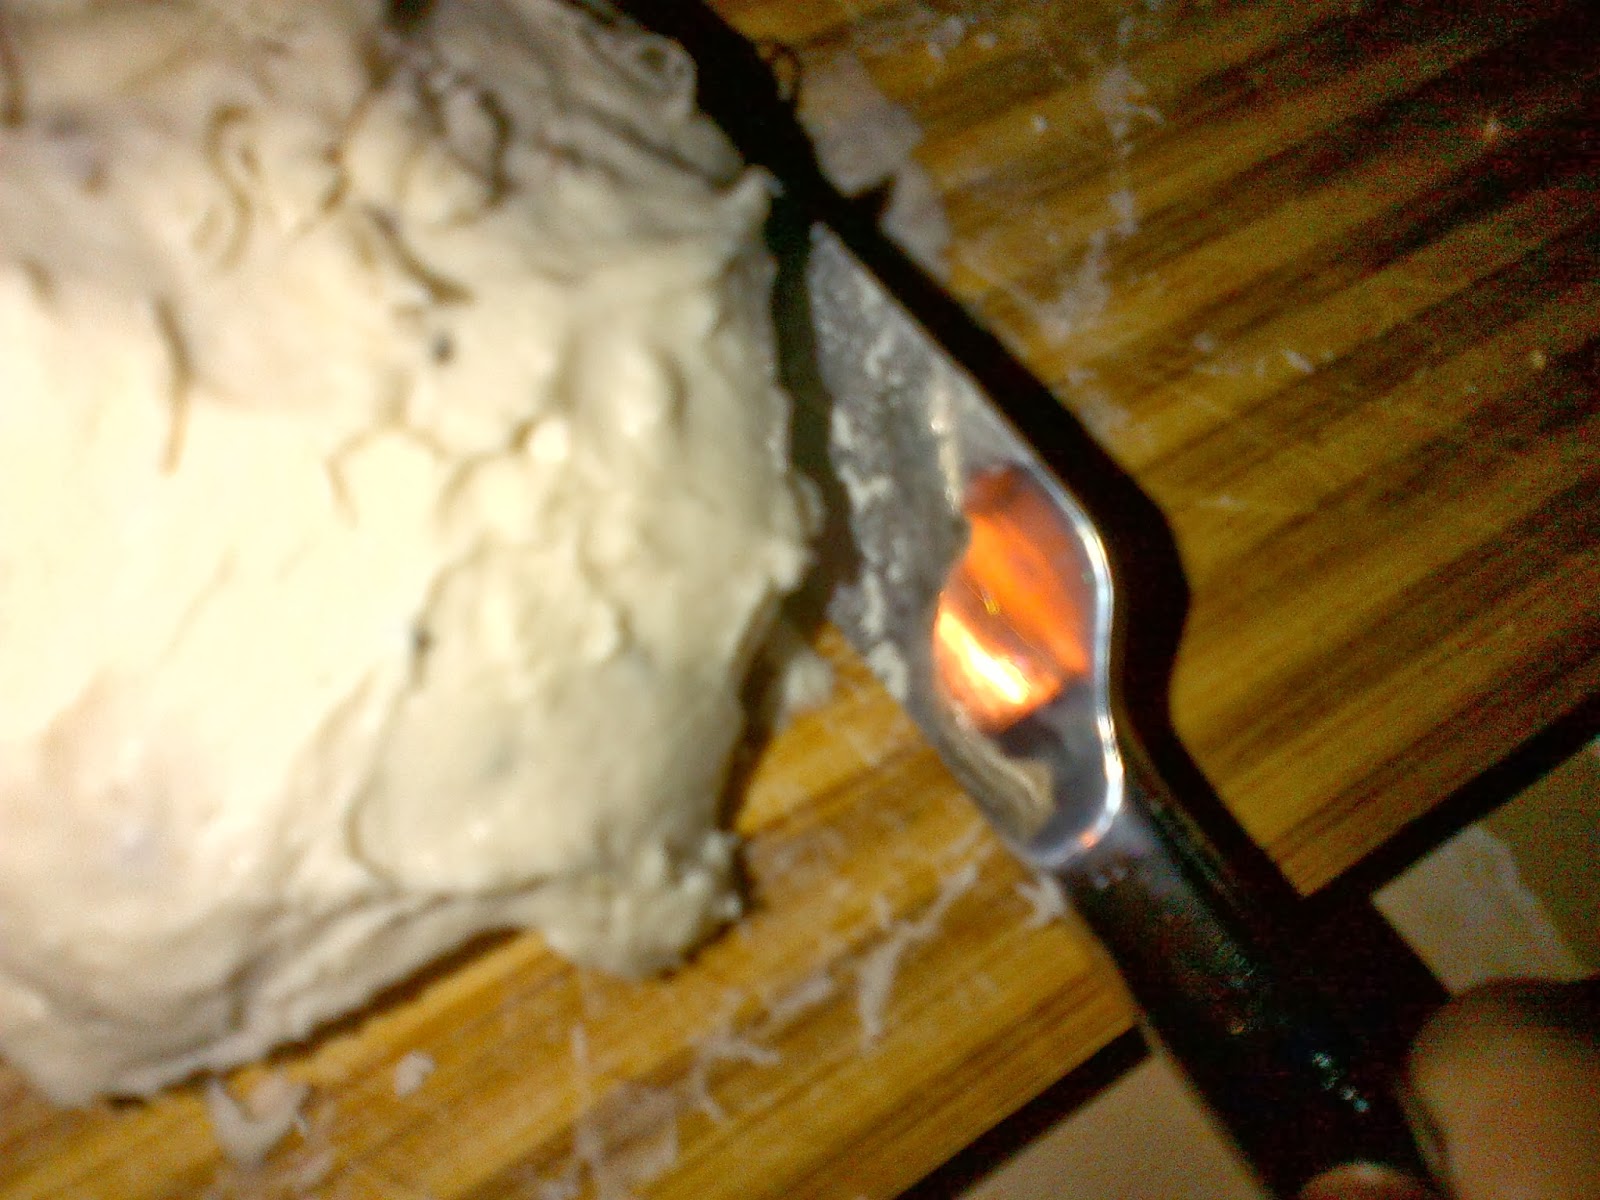
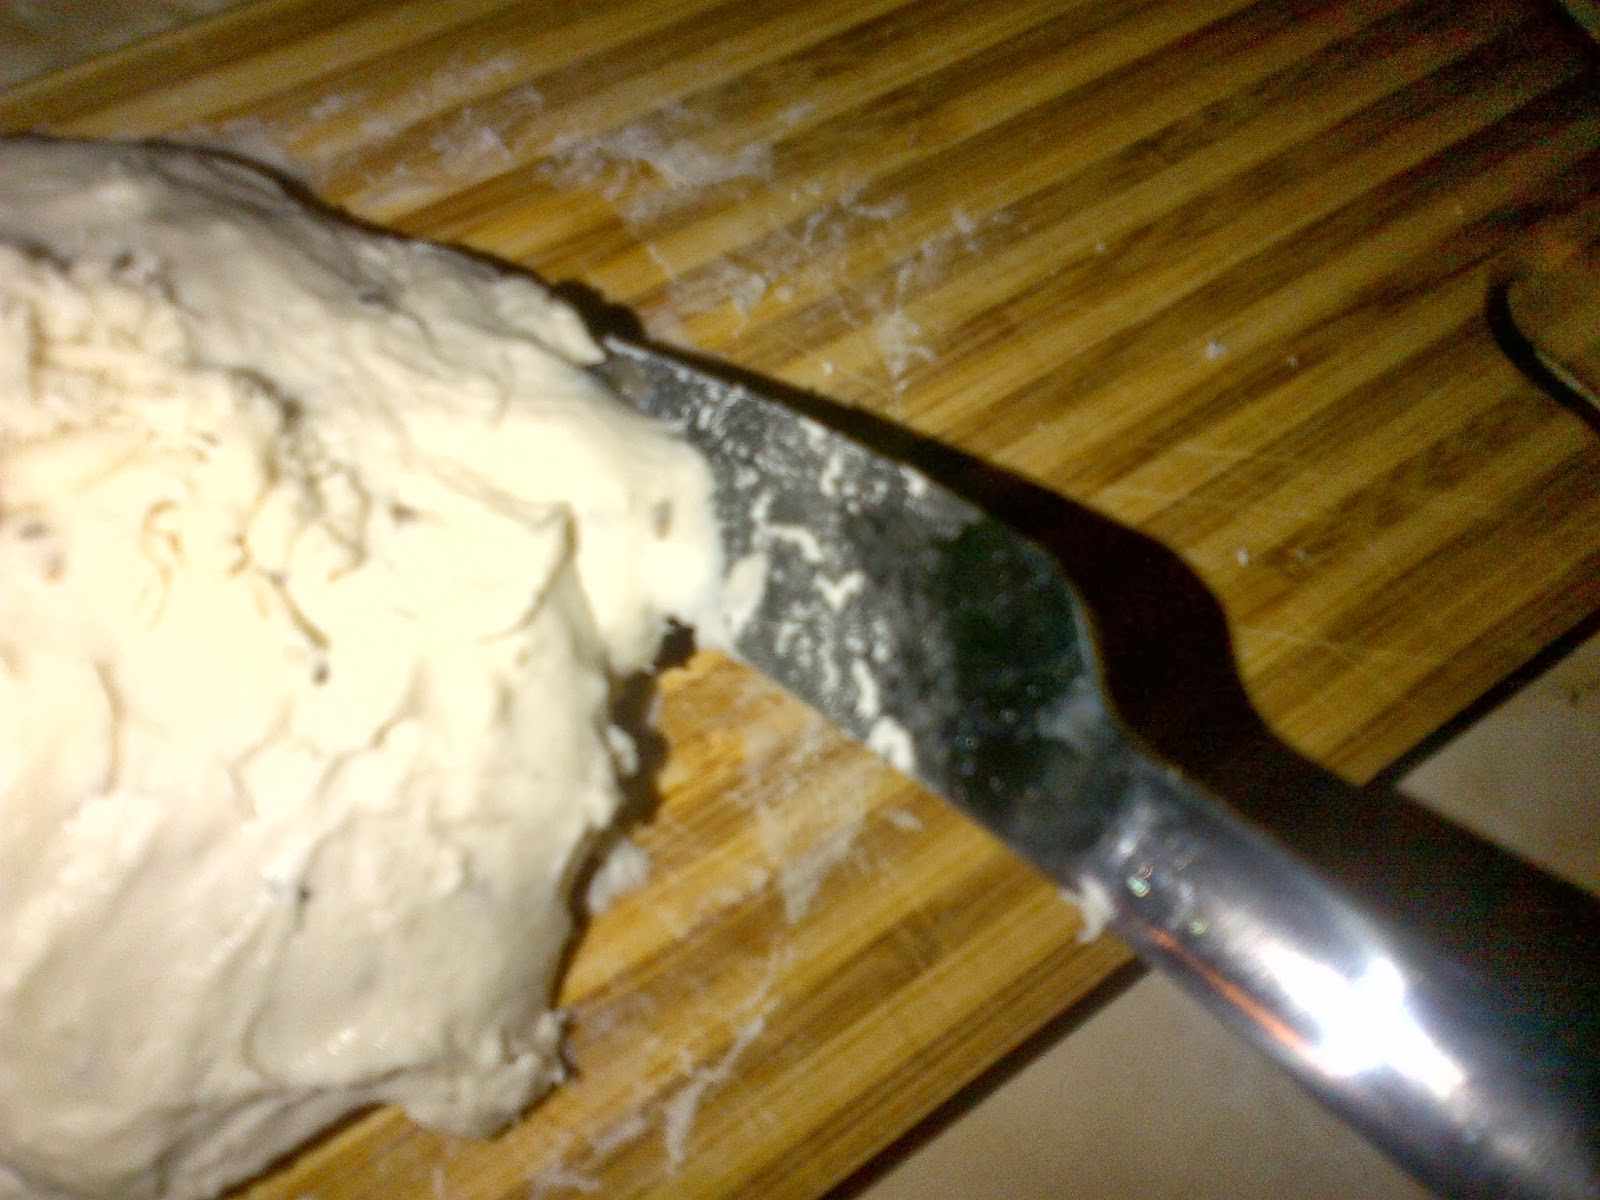
The mass will stick to a cutting board - this is inevitable - a lot of bakers will have a metal scraper to fold this stuff back into the mass, I use the dull edge of a butter knife to accomplish this.
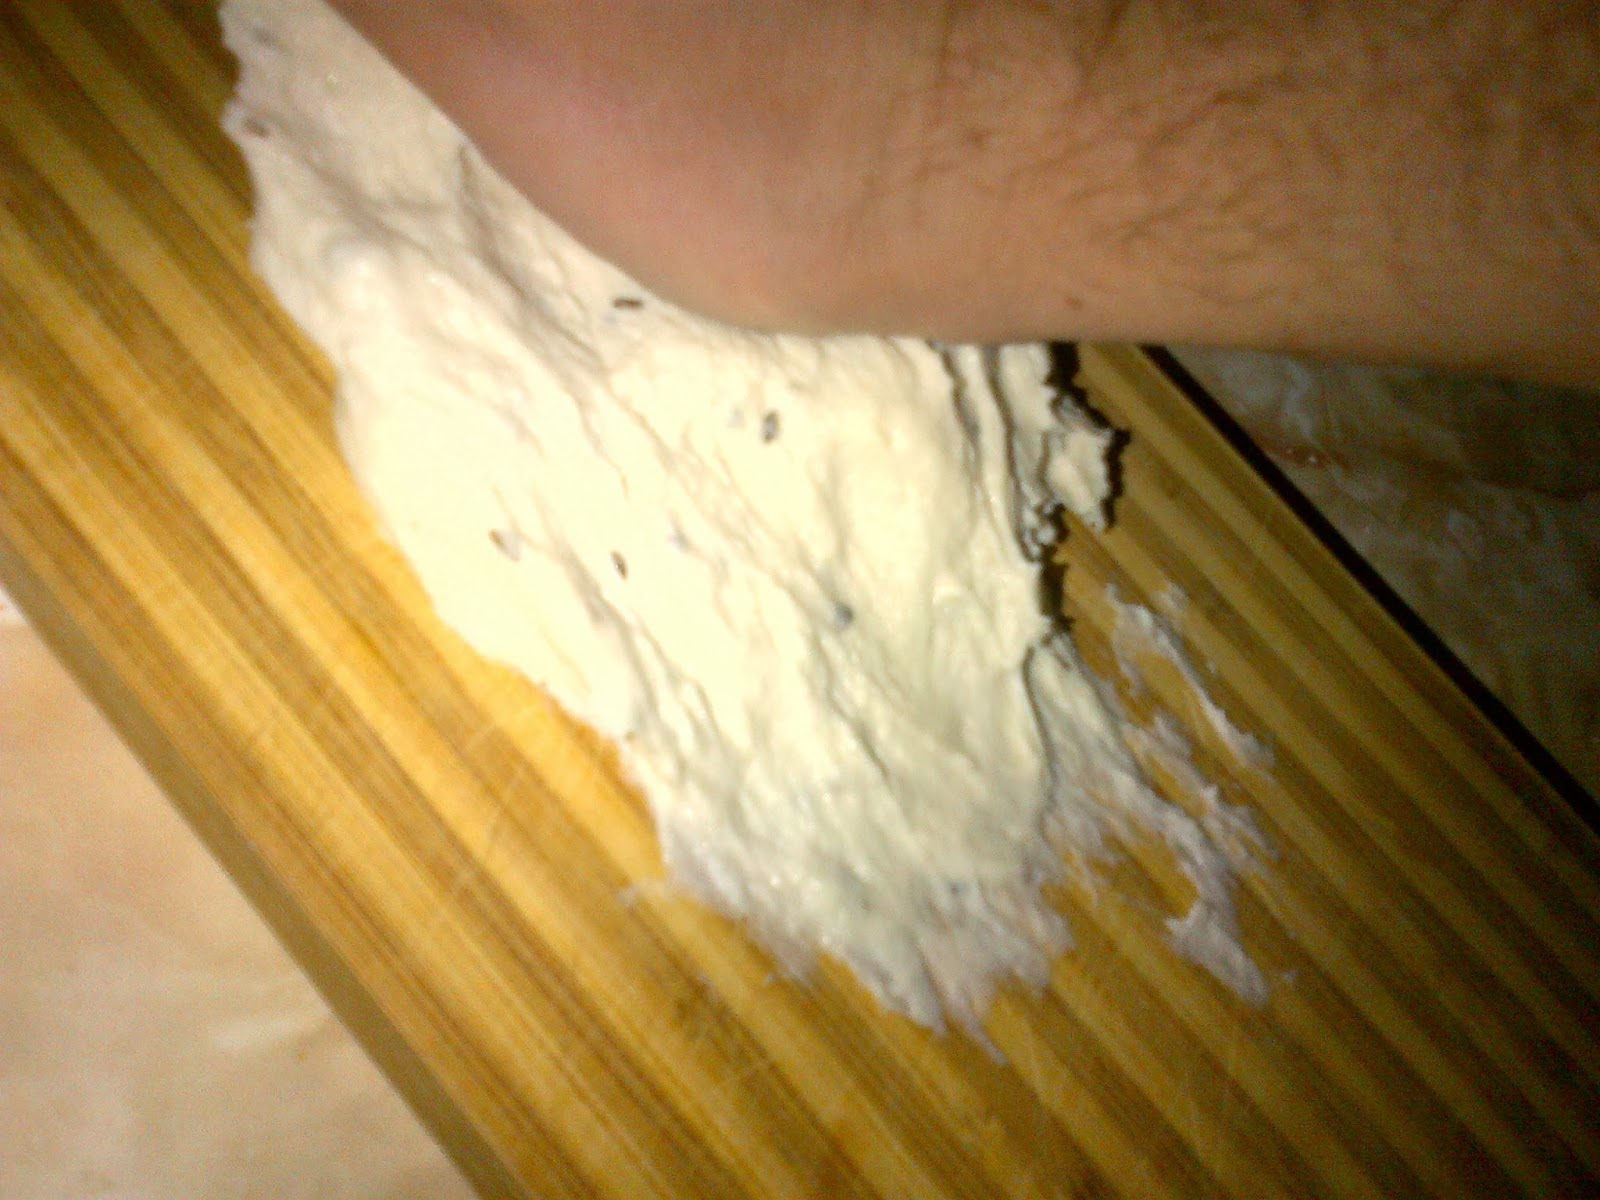

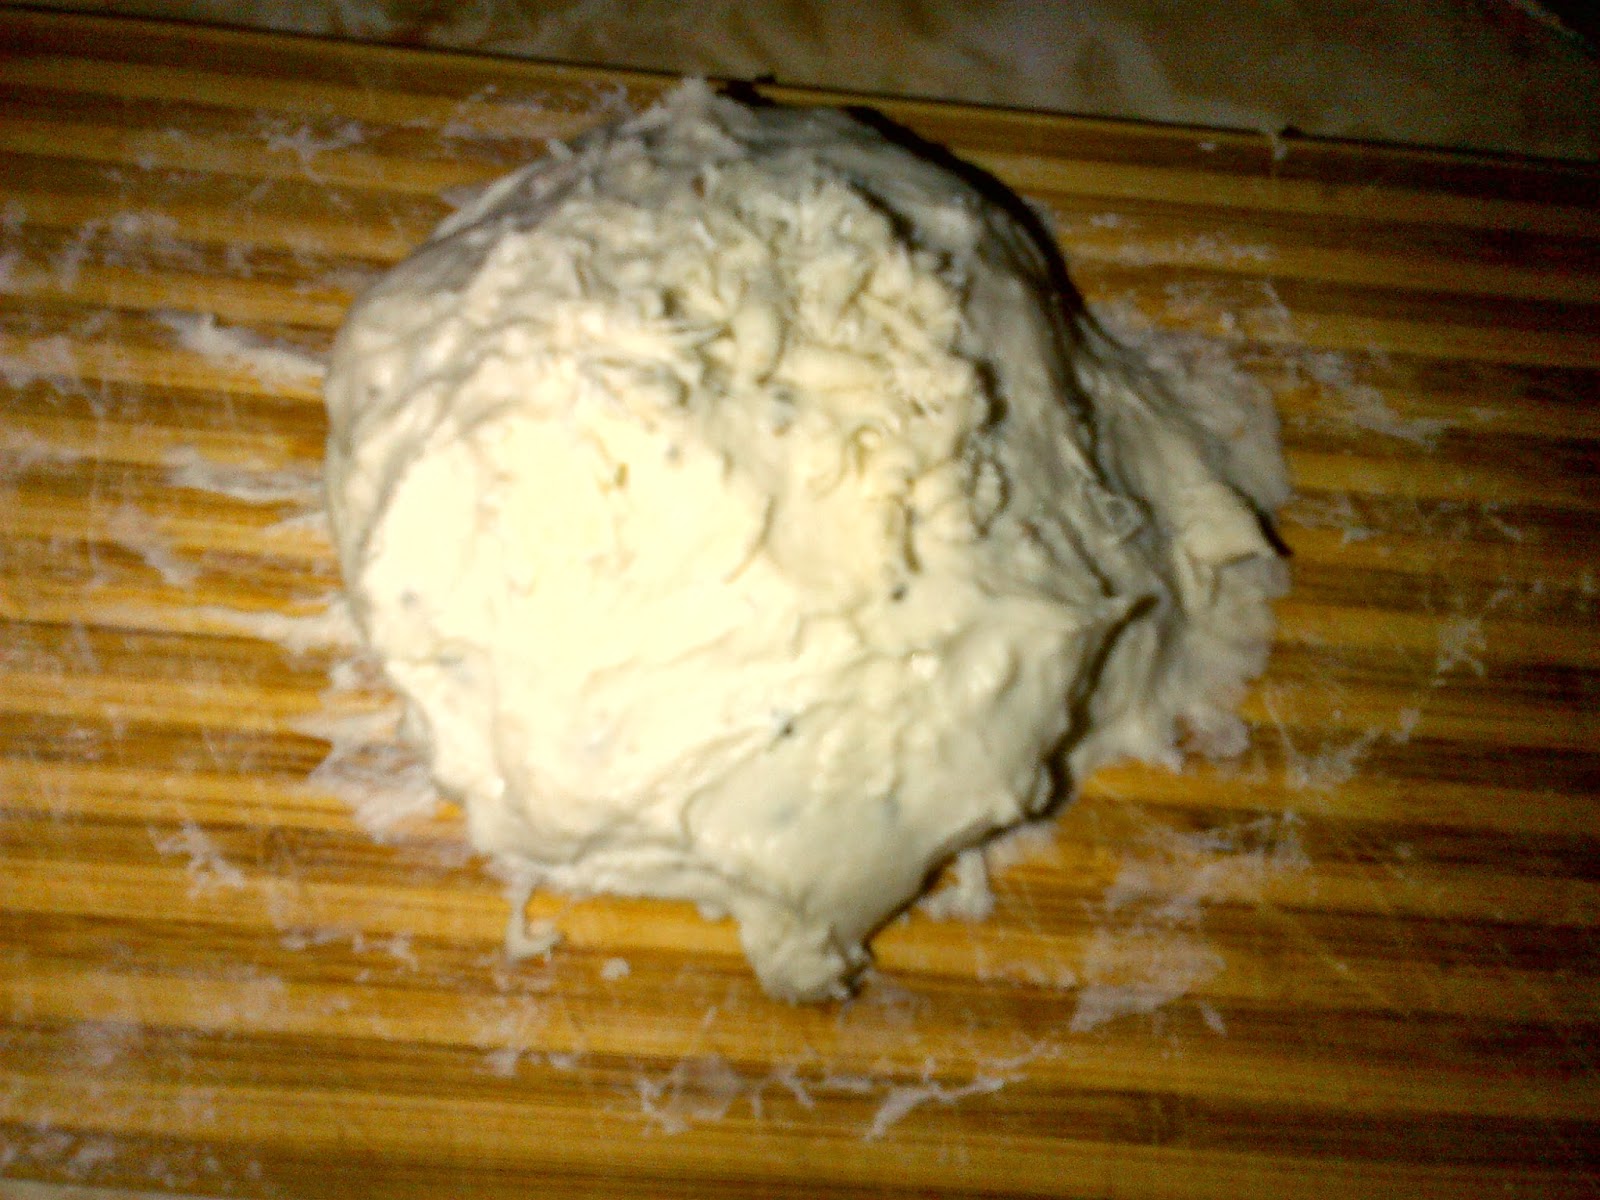

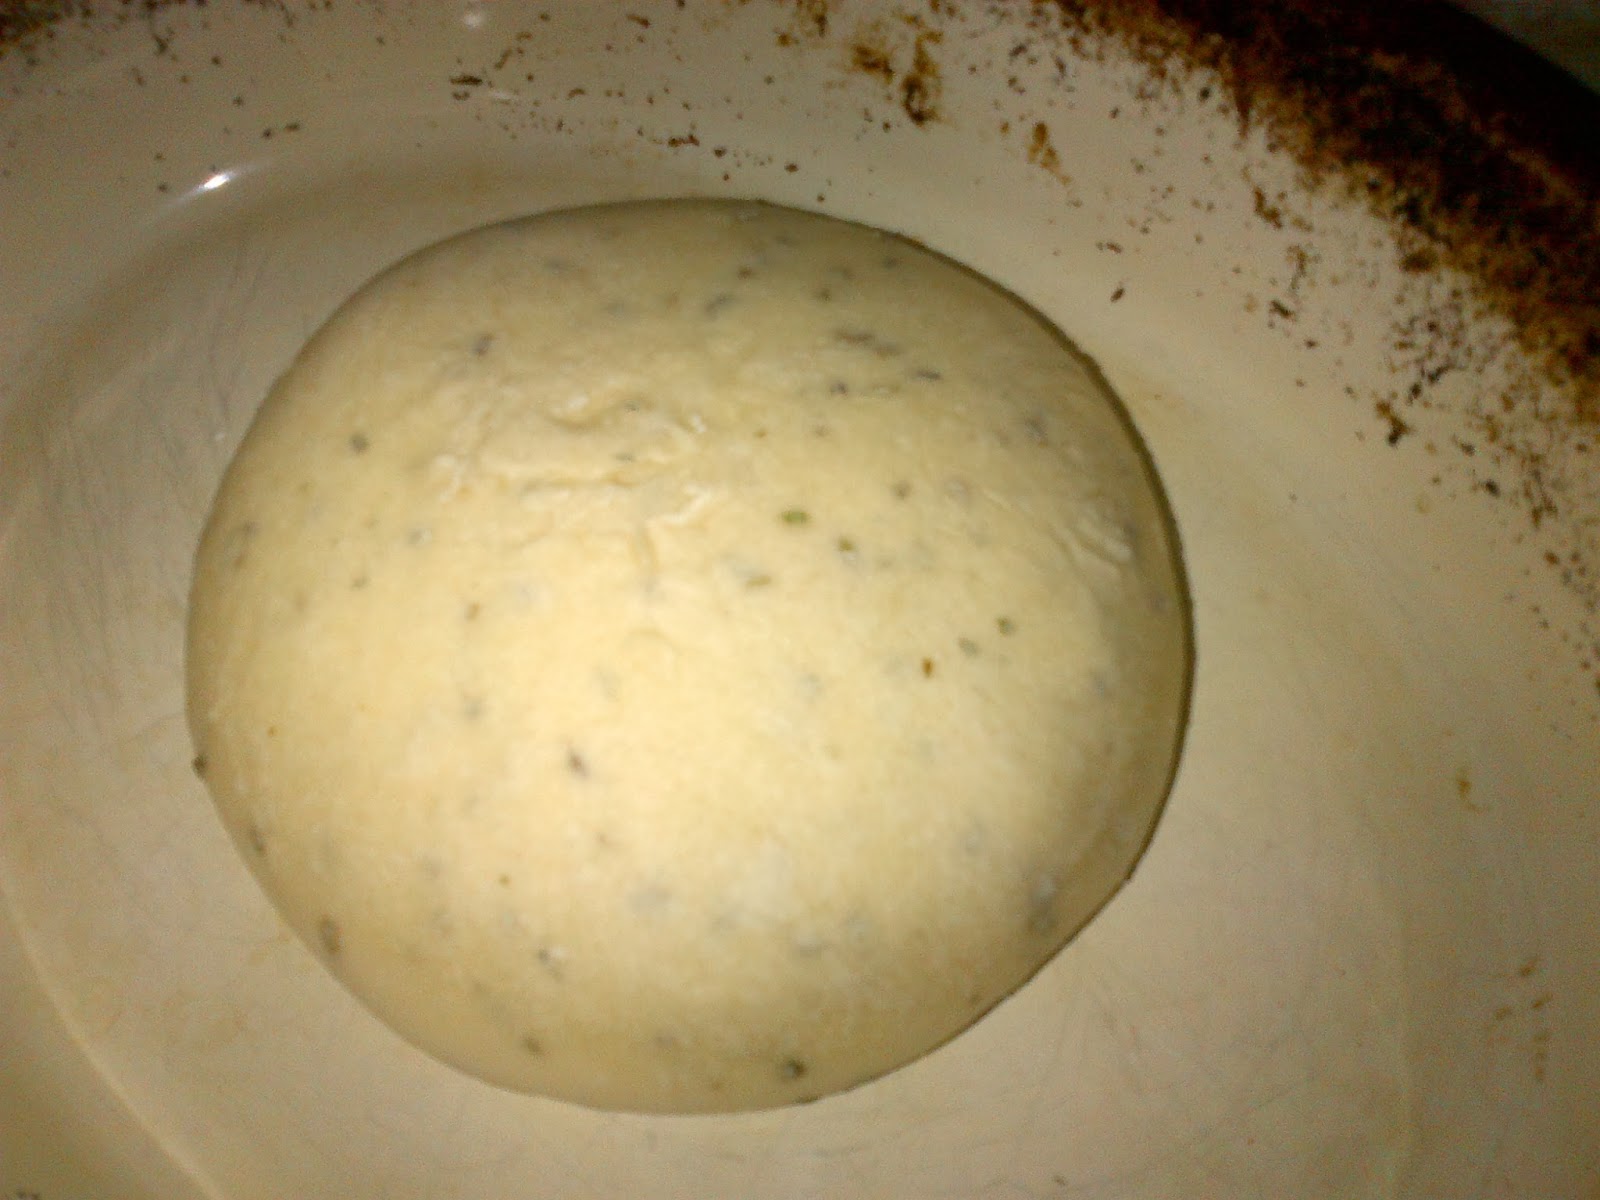
As for your hands, you can just wash this off or roll your hands together over the mixing bowl and put this stuff back into the mass. After 10 or 15 minutes of kneading, the mass will become even more manageable and I will shape it into a round ball and put it back into the mixing bowl for the first rise. Cover this with a tea towel and leave for 30 or so minutes.

At this point, the dough will be a little bit easier to handle, I have heard that adding a bit more flour is "cheating" but I am not sure that I agree. Anyway, the goal is to have this mass that has gone from a peanut butter like mass in terms of stickiness and consistency into something that feels like play-dough, i.e. it does not readily stick to your fingers. At this point, the dough should be shaped one last time and put into either proofing basket or back into the mixing bowl if that is what you are going to use. Cover it with a tea towel - some suggest cling-wrap - I don't like this kind of product so I have none in my kitchen. Put it in the cupboard and allow to rise for 8 hours or overnight as I will tend to do - this makes all the difference. My breads went from tasty bricks to tasty bread (with holes and such) after I started doing this.
After proofing overnight, the dough has changed colour and grown in size - not sure about "doubling" but it does increase in volume by a noticeable amount.
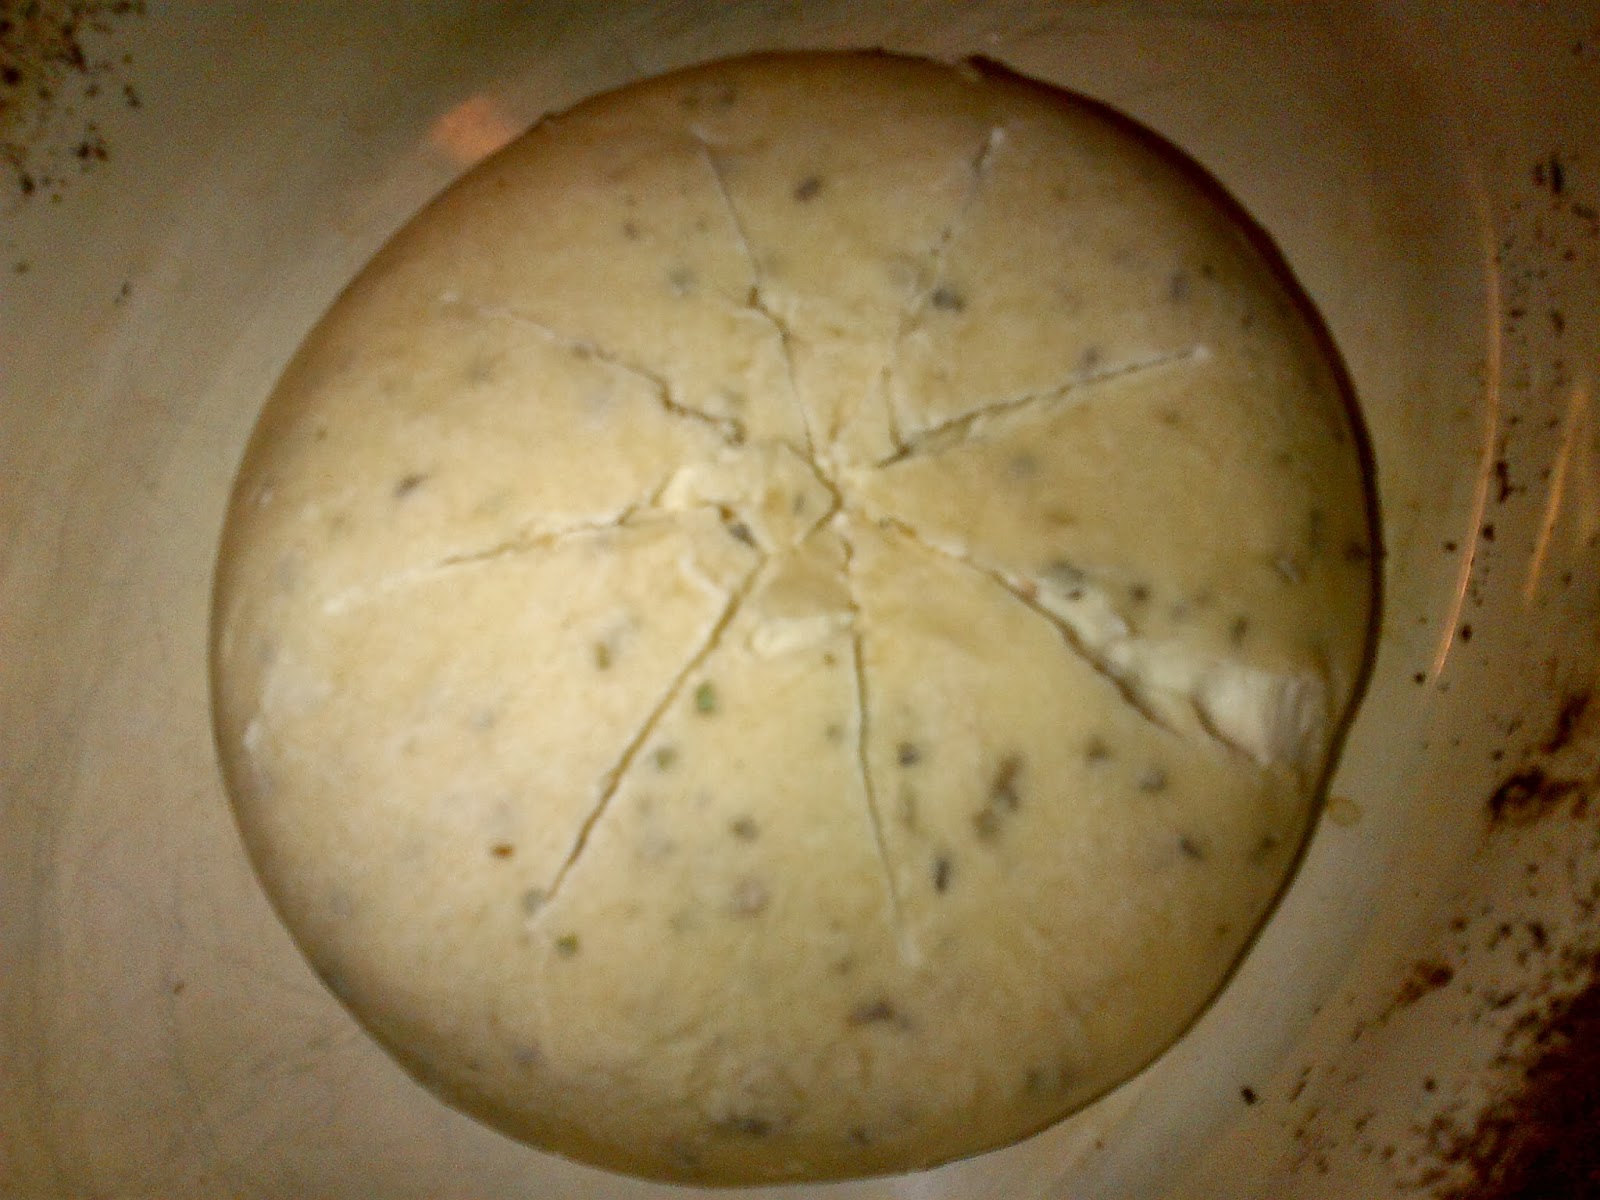
Scoring the proofed dough with a very sharp knife is generally a good idea, but I have skipped it once or twice without too much ill effect. Generally this will prevent the dough from bursting in an unattractive way when it is baking.

Baking. Preheat your oven to 450 Fahrenheit or 220 Celsius. After this is done, have some water ready. Put your dough in your baking container, and put it in the oven. I recommend either misting the oven at this point with water, putting a container with a small amount of water on the lower rack - or do what I did and play dangerous and just drip about a handful of water on the bottom of the oven and get ready to back away and close the oven door because the steam is instant an it is scalding. The purpose of this is to reinforce a crispy and darker crust, and yes I have noticed a difference in my baking experiments.
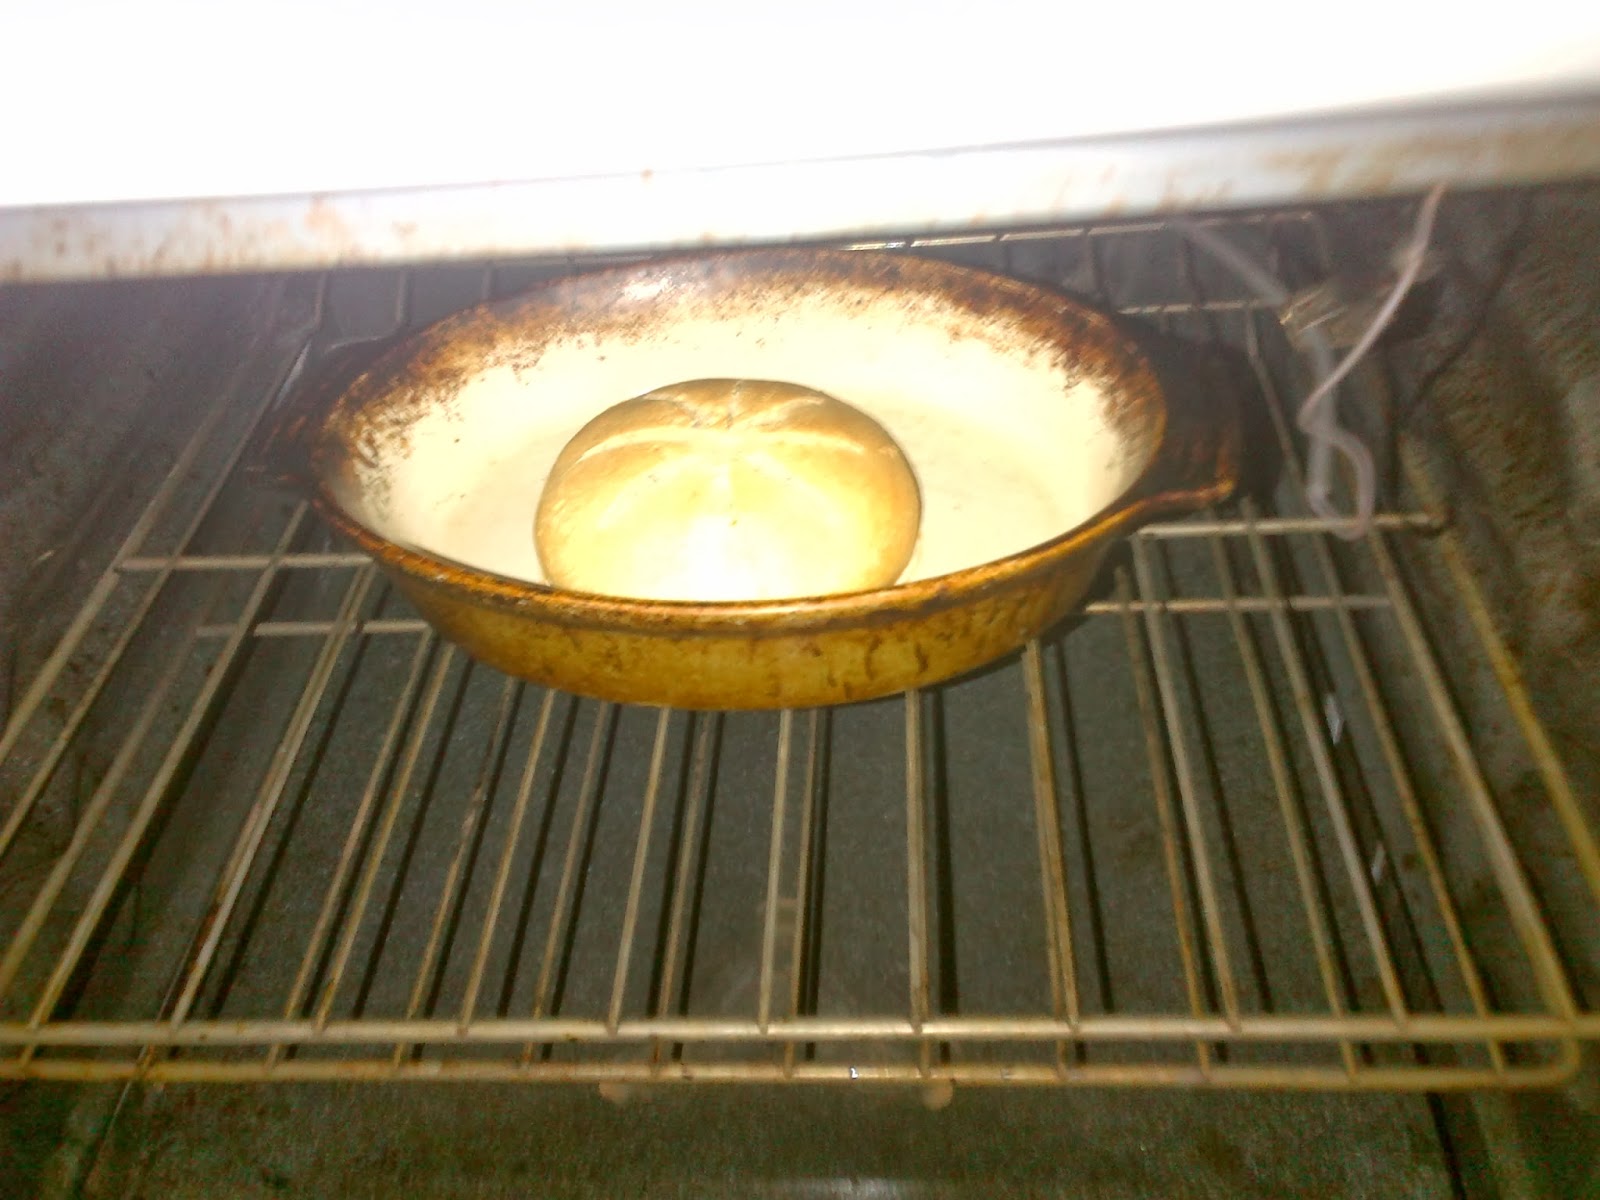
Usually I will keep doing the water thing for the first twenty minutes about every five minutes or so. If you have a container of water, you should remove it after the first 20 minutes. I tend to cool the oven a touch by lowering the temperature at this point also down to 400, then a few minutes later down to 350 for the next 10, then down to about 200 for the last 5 minutes or so. I will then after 35-45 minutes turn off the oven completely, and allow the bread to sit for five or so minutes before removing it.
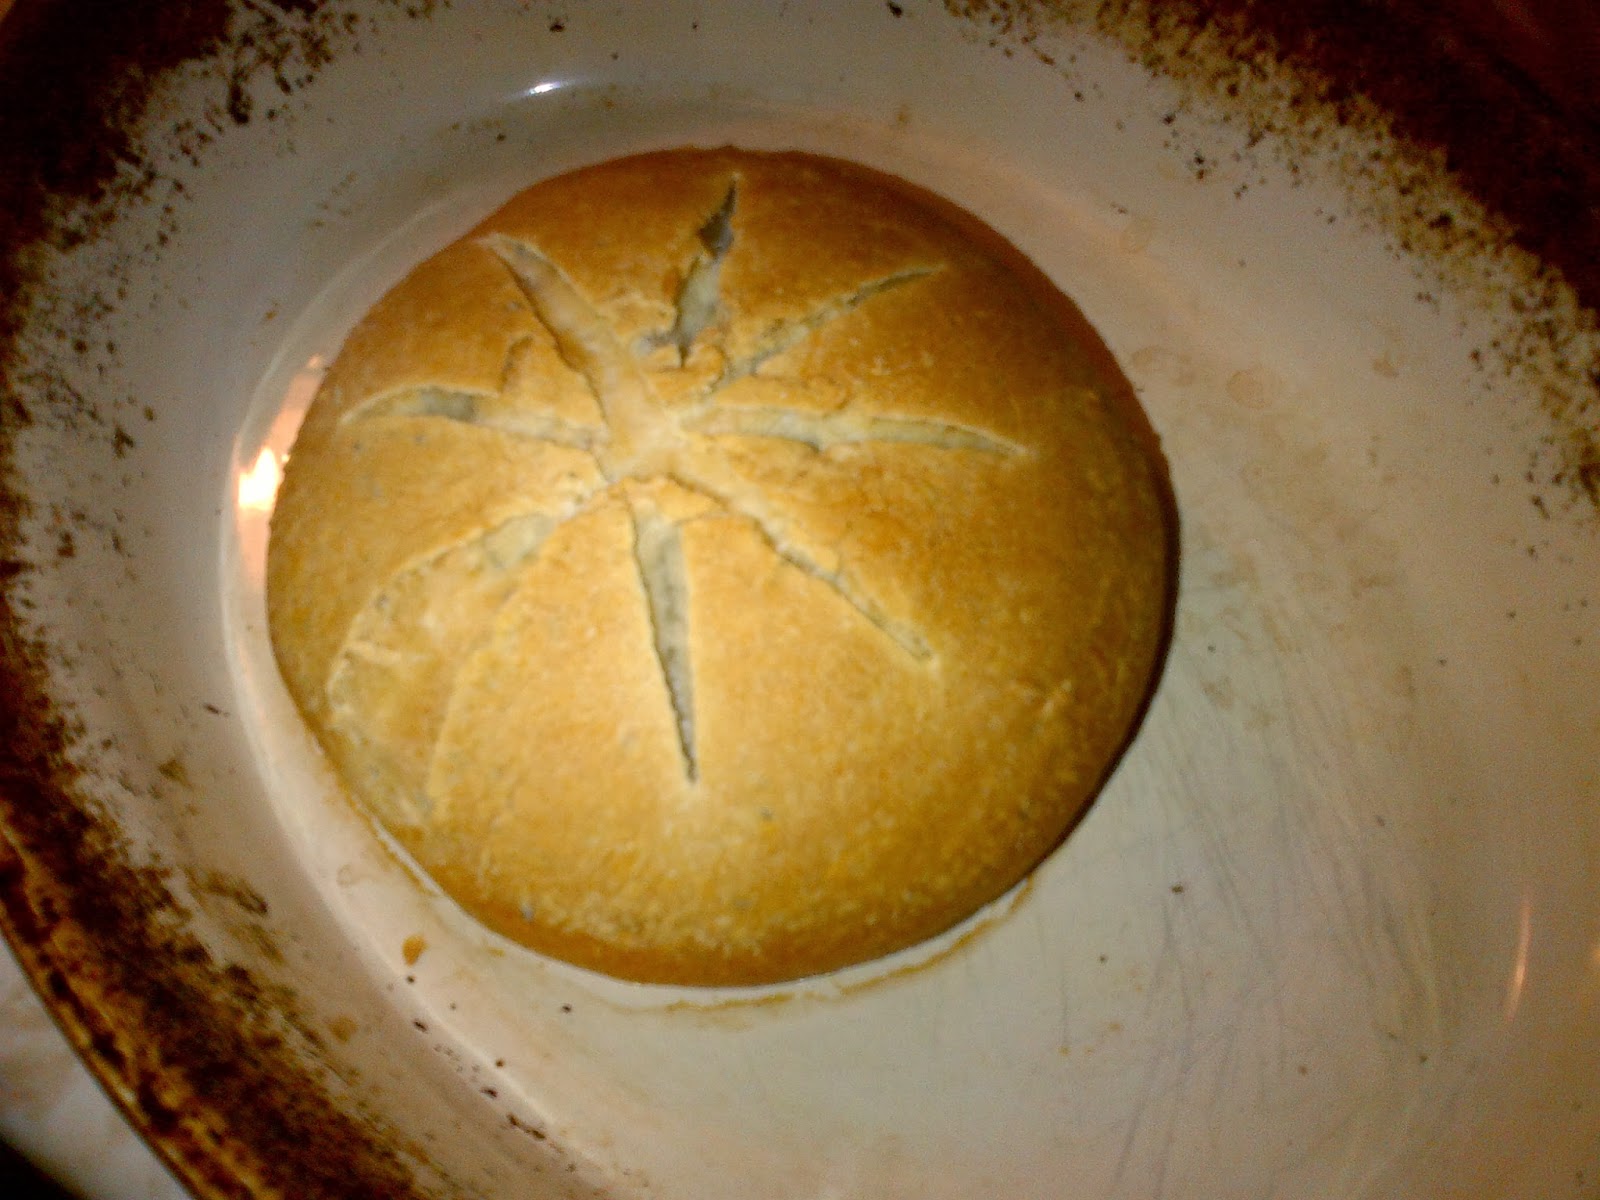
The finished product should look somewhat like the bread you might find in a decent bakery, but you did it yourself and it is yours. The one above was a second attempt at a boule, while the first, below was the first attempt ~ If you look closely, you might notice the lame pentacle I carved into the top.


Moving along, after a few attempts, one including my first use of bulgur, came out with a cornbread texture - it was not what I was looking for but it tasted fine nonetheless and I figured out how that happend, so now I can do it again if I want.
This is the loaf that I did not score, but it came out just fine, and in some ways, the crust and colour was the best yet out of my kitchen.


Further reading about sourdough:
http://en.wikipedia.org/wiki/Sourdough
A scientific article on the benefits of eating sourdough bread
No comments:
Post a Comment